Demystifying Paint Correction: A Closer Look
Paint correction is an intricate process that removes imperfections from your vehicle’s paint, such as swirl marks and scratches, restoring its original luster and brilliance. While it may seem daunting at first, understanding the key steps involved in the paint correction process can help demystify this transformative technique and empower you to achieve professional-quality results.
Step 1: Inspection and Assessment
The first step in the paint correction process is a thorough inspection and assessment of your vehicle’s paintwork. This involves closely examining the surface for imperfections such as swirl marks, scratches, oxidation, and water spots. By identifying the specific issues affecting the paint, you can develop a targeted plan of action to address them effectively. Additionally, assessing the condition of the paint helps determine the extent of correction required and informs the selection of appropriate tools and products for the job.
Step 2: Surface Preparation
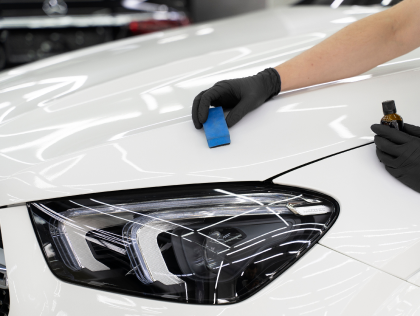
Once the paint has been assessed, the next step is to prepare the surface for correction. This typically involves washing the vehicle to remove dirt, grime, and any existing wax or sealant layers that may interfere with the correction process. Additionally, decontaminating the paint with a clay bar or chemical fallout remover helps eliminate embedded contaminants that can cause further damage if not addressed prior to correction. Proper surface preparation is essential for achieving optimal results and ensuring that the correction process proceeds smoothly.
Step 3: Correction Techniques and Tools
With the surface prepared, the paint correction process can begin in earnest. Depending on the severity of the imperfections, various correction techniques and tools may be employed, ranging from abrasive compounds and polishing pads to machine polishers and rotary buffers. These tools are used to remove a thin layer of clear coat from the surface, effectively leveling out imperfections and restoring a smooth, uniform finish. It’s important to use the correct combination of products and techniques to avoid causing further damage to the paint and achieve the desired results.
Step 4: Finishing Touches and Protection
Once the correction process is complete, the final step involves applying finishing touches and protection to the newly corrected paintwork. This may include applying a sealant or wax to enhance gloss and provide long-lasting protection against environmental contaminants. Additionally, inspecting the paint for any remaining imperfections and addressing them as needed ensures a flawless finish that meets the highest standards of quality and aesthetics. By taking the time to understand the intricacies of the paint correction process and following these key steps, you can achieve professional-grade results and transform your vehicle’s appearance with confidence and precision.


